.jpg)
Classroom Setup: A Step-by-Step Guide for Early Learning
Key takeaways:
- Classroom setup is a sequence, not a shopping list. Buying before measuring is the single most expensive mistake, because furniture that does not fit rarely goes back.
- The ECERS-3 rating scale devotes its first seven items to space and furnishings, which is a useful order of operations even if you are never formally rated.
- Anchoring is a scheduled job, not something that happens naturally on delivery day. Nobody owns it unless someone is named.
- Label for the substitute you will need in November, not for the staff who set the room up in August.
Most classroom setup advice is a list of things to buy, which is the least useful form it could take.
The order is what actually decides whether a room works. Measure late and the shelving you already paid for does not fit the wall you meant it for. Zone late and the art table ends up across the room from the sink, so paint crosses the carpet every day for a year. Anchor late and it does not happen at all.
This guide runs the sequence in the order a room actually gets built, from an empty space to a room that opens on time. It is written for daycare, preschool and kindergarten rooms rather than for a fifth-grade classroom, so the assumptions are child-height furniture, learning centers instead of rows, and a licensing visit somewhere in your future.
Why Classroom Setup Order Matters More Than the Shopping List
Every step in a classroom setup constrains the ones after it, and the constraints only run one direction.
Your square footage sets your group size. Group size sets how many centers you can run. The position of the sink and the doors sets where the wet and messy centers can go. Only after all of that does furniture selection make any sense, because now you know the footprint each piece has to fit.
Do it backward, which is what a catalog encourages, and you end up designing the room around what you already bought. That is how a center ends up with a beautiful reading loft blocking the only window, or a sand and water table forty feet from a water source.
The reordering costs nothing. It just requires not opening a catalog for the first week.
What the Standards Actually Ask For
Two documents are worth reading before you plan a room, and neither is a sales brochure.
The first is the NAEYC Early Learning Program Standards. Standard 9, Physical Environment, asks that a program provide "a safe and healthful environment" with "appropriate and well-maintained indoor and outdoor physical environments," including the facilities, equipment and materials that let both children and staff learn. It is deliberately broad, and it makes the point that the environment serves the adults too.
The second is more specific. The Early Childhood Environment Rating Scale, now in its third edition, consists of 35 items across 6 subscales, and observers score a classroom over a three-hour visit. Its first subscale is Space and Furnishings, covering indoor space, furniture for routine care and play, room arrangement, space for privacy, child-related display, and gross motor space and equipment.
Drawn as items rather than subscales, the scale's order of priorities is hard to miss.
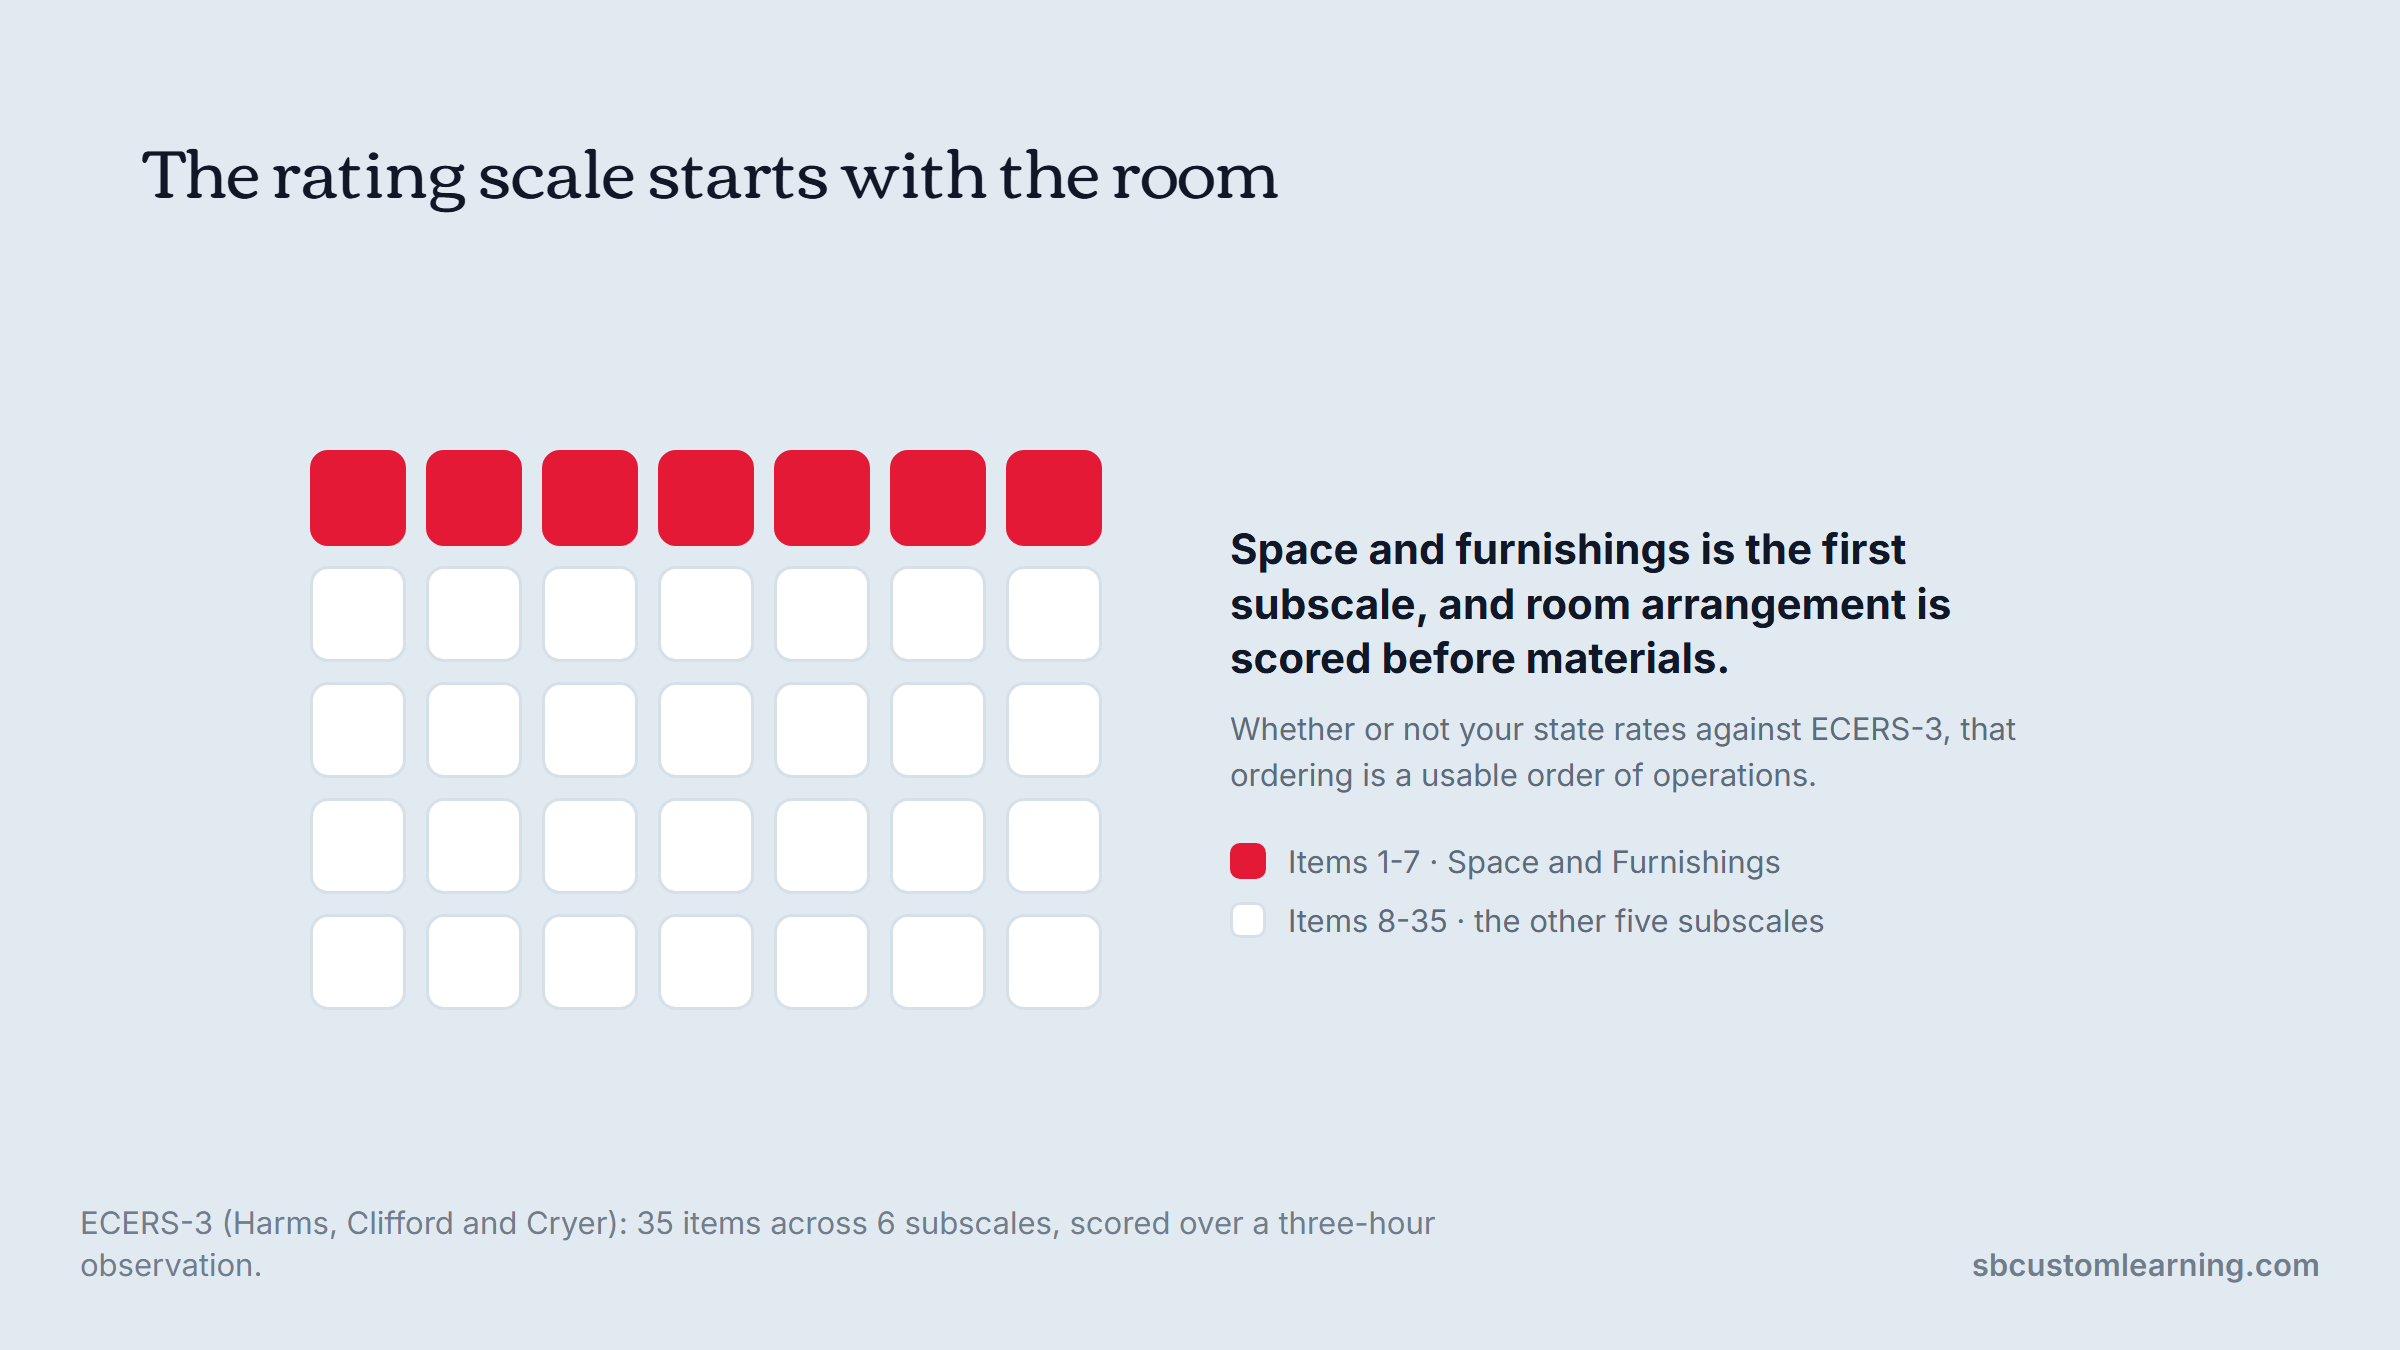
That ordering is the useful part. Whether or not your state uses ECERS-3 in its rating system, the scale treats space and furnishings as the foundation the rest of the classroom quality sits on, and it puts room arrangement ahead of materials.
Worth noting: privacy space is an item in its own right. Most rooms we walk into have nowhere for a child to be alone while still supervised, and it is one of the cheapest things to add.
Measure the Room Before You Buy Anything
Measuring sounds too obvious to be step one, and it is skipped constantly.
Measure the wall lengths, the ceiling height, the window sill height, and the swing of every door. Note where the outlets are, where the thermostat is, and which direction the windows face. Photograph each wall straight on.
That set of numbers is what makes a floor plan possible, and what stops you buying a 48-inch shelf for a 44-inch space. Our team measures on site at the start of a project, because a layout built from someone else's numbers is a layout built on trust.
The second measurement is the children. Not literally, but pull the age band and the group size, because seat height, table height and shelf reach all follow from it. A room for two-year-olds and a room for five-year-olds with identical dimensions need different furniture at every point.
The number that governs everything is usable floor area, which is not the same as total area. Subtract the door swings, the space in front of the exits, and anything a radiator or a cabinet already occupies. What is left is what you can actually program.
Map What You Cannot Move
Every classroom has fixed points, and they decide more of the layout than any design preference will.
The sink is the most important one. Art, sand and water, and anything involving dough or paint want to be near it, and a center placed far from water generates a traffic path across the room that will cross whatever you put in between. Bathrooms, the door to the corridor and the fire exit are the others, and they need clear routes that stay clear all year.
Windows are a mixed blessing worth planning around rather than celebrating. Natural light is genuinely good for a room, and a west-facing window in a book corner makes that corner unusable at 3pm in June. Light also fades whatever you put in front of it.
The last immovable is the one people forget: where an adult can stand and see the whole room. Mark that spot on the plan before you place a single piece of furniture, because everything tall gets judged against it. The acoustic and material side of this is covered in our note on thoughtful classroom design.
Zone for Noise, Water and Traffic
Zoning is where a classroom setup either becomes calm or becomes a year of low-level conflict.
Three variables do the work: how loud a center is, how wet it is, and how much through-traffic it generates. Get those grouped correctly and the room mostly runs itself. Get them wrong and you will spend the year moving children rather than teaching them.
| Zone | Centers it holds | Wants to be near | Must not be near |
|---|---|---|---|
| Wet and messy | Art, sand and water, dough, science | The sink, a hard floor, storage for smocks | Carpet, book corner, cots |
| Loud and active | Blocks, dramatic play, music, gross motor | Each other, open floor | Quiet zone, sleeping area |
| Quiet | Library, writing, puzzles, privacy nook | A corner, soft surfaces, natural light | Doors, sinks, block area |
| Routine care | Cubbies, diapering, hand washing, cots | The door, the bathroom, water | Food prep, art |
| Circulation | The routes between all of the above | Nothing, it needs to stay empty | Anything placed in it |
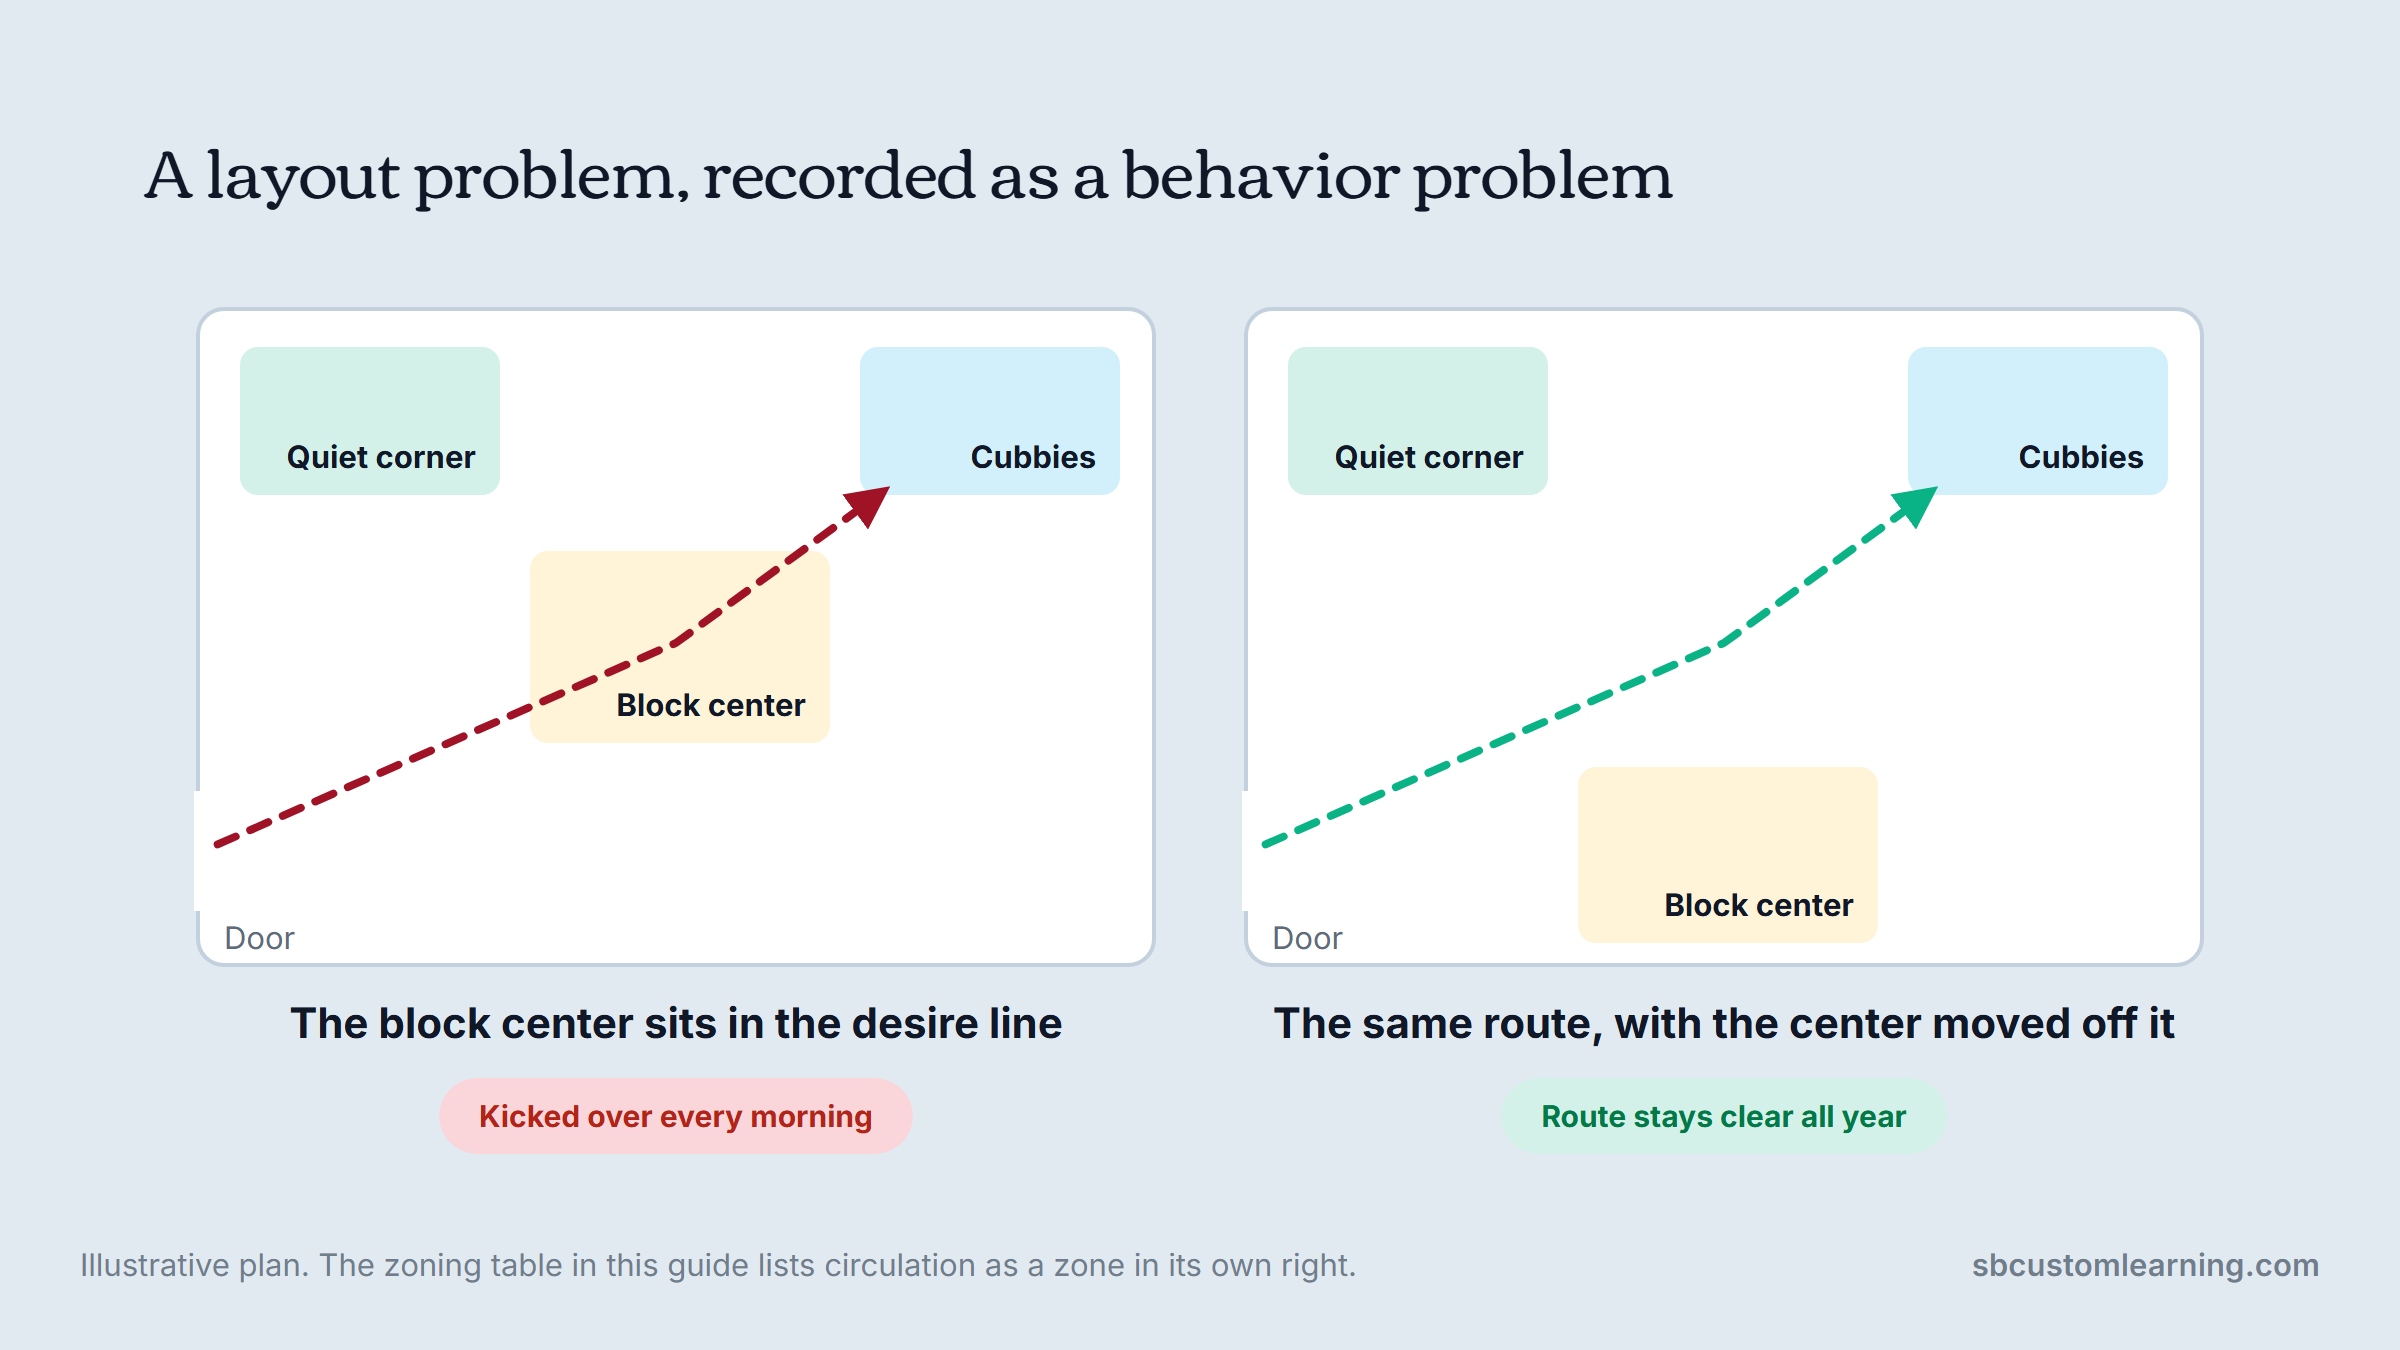
The circulation row is the one that gets ignored on paper and enforced by children in practice. If a route between the door and the cubbies runs through the block area, blocks will get kicked over every morning, and it will be recorded as a behavior problem rather than a layout problem.
The same room twice, with the block center moved off the line children already walk.
One large open room serving two age groups cannot be zoned this way at all, which is the case for dividing it with proprietary walls before you place anything.
Place the Furniture, Then Anchor It
Furniture placement in an early learning room does two jobs at once: it holds materials, and it draws the walls of each center.
Low shelving is what makes a zone legible to a three-year-old. Back-to-back shelves define a boundary without a wall, keep sightlines open, and can be repositioned when the age group changes. Tall units break sightlines and belong against walls, if you use them at all.
Anchoring is the step that most often gets skipped, because delivery day is chaotic and nobody owns the job. Tip-over risk is real for any unit a child can climb, and the fix is a wall strap or bracket into a stud rather than into drywall alone. Put a named person and a date against it on the setup plan, or it will still be undone in October.
Door hardware belongs in the same safety pass. Crushed fingers on a hinge side are among the most preventable injuries in a center, and FingerShield is the guard we fit on Illinois projects.
Stock It at Child Height
A room can be laid out perfectly and still fail at the moment a child reaches for something.
Put the most-used materials between the child's knee and shoulder height, which for a three-year-old is roughly the second shelf of a standard low unit. Anything above shoulder height is adult storage, and it should look like adult storage so nobody is tempted to put crayons up there. Keep shelves shallow enough that nothing hides at the back.
Open storage is the default for materials in daily use, because a child cannot choose what they cannot see. Closed storage is for the rotation stock and the things that need to be out of circulation. Most preschool rooms we furnish end up with noticeably more open than closed, though the split depends on how much you rotate.
Restraint at this stage is worth more than abundance. A room stocked to capacity in August leaves you nothing to introduce in January, and there is good evidence that fewer materials out at once produces longer, more focused play. Our shortlist of essential classroom supplies is deliberately short for that reason.
Label It for the Substitute You Will Need
Labeling is treated as a finishing touch and is actually the step that decides whether the setup survives contact with a real year.
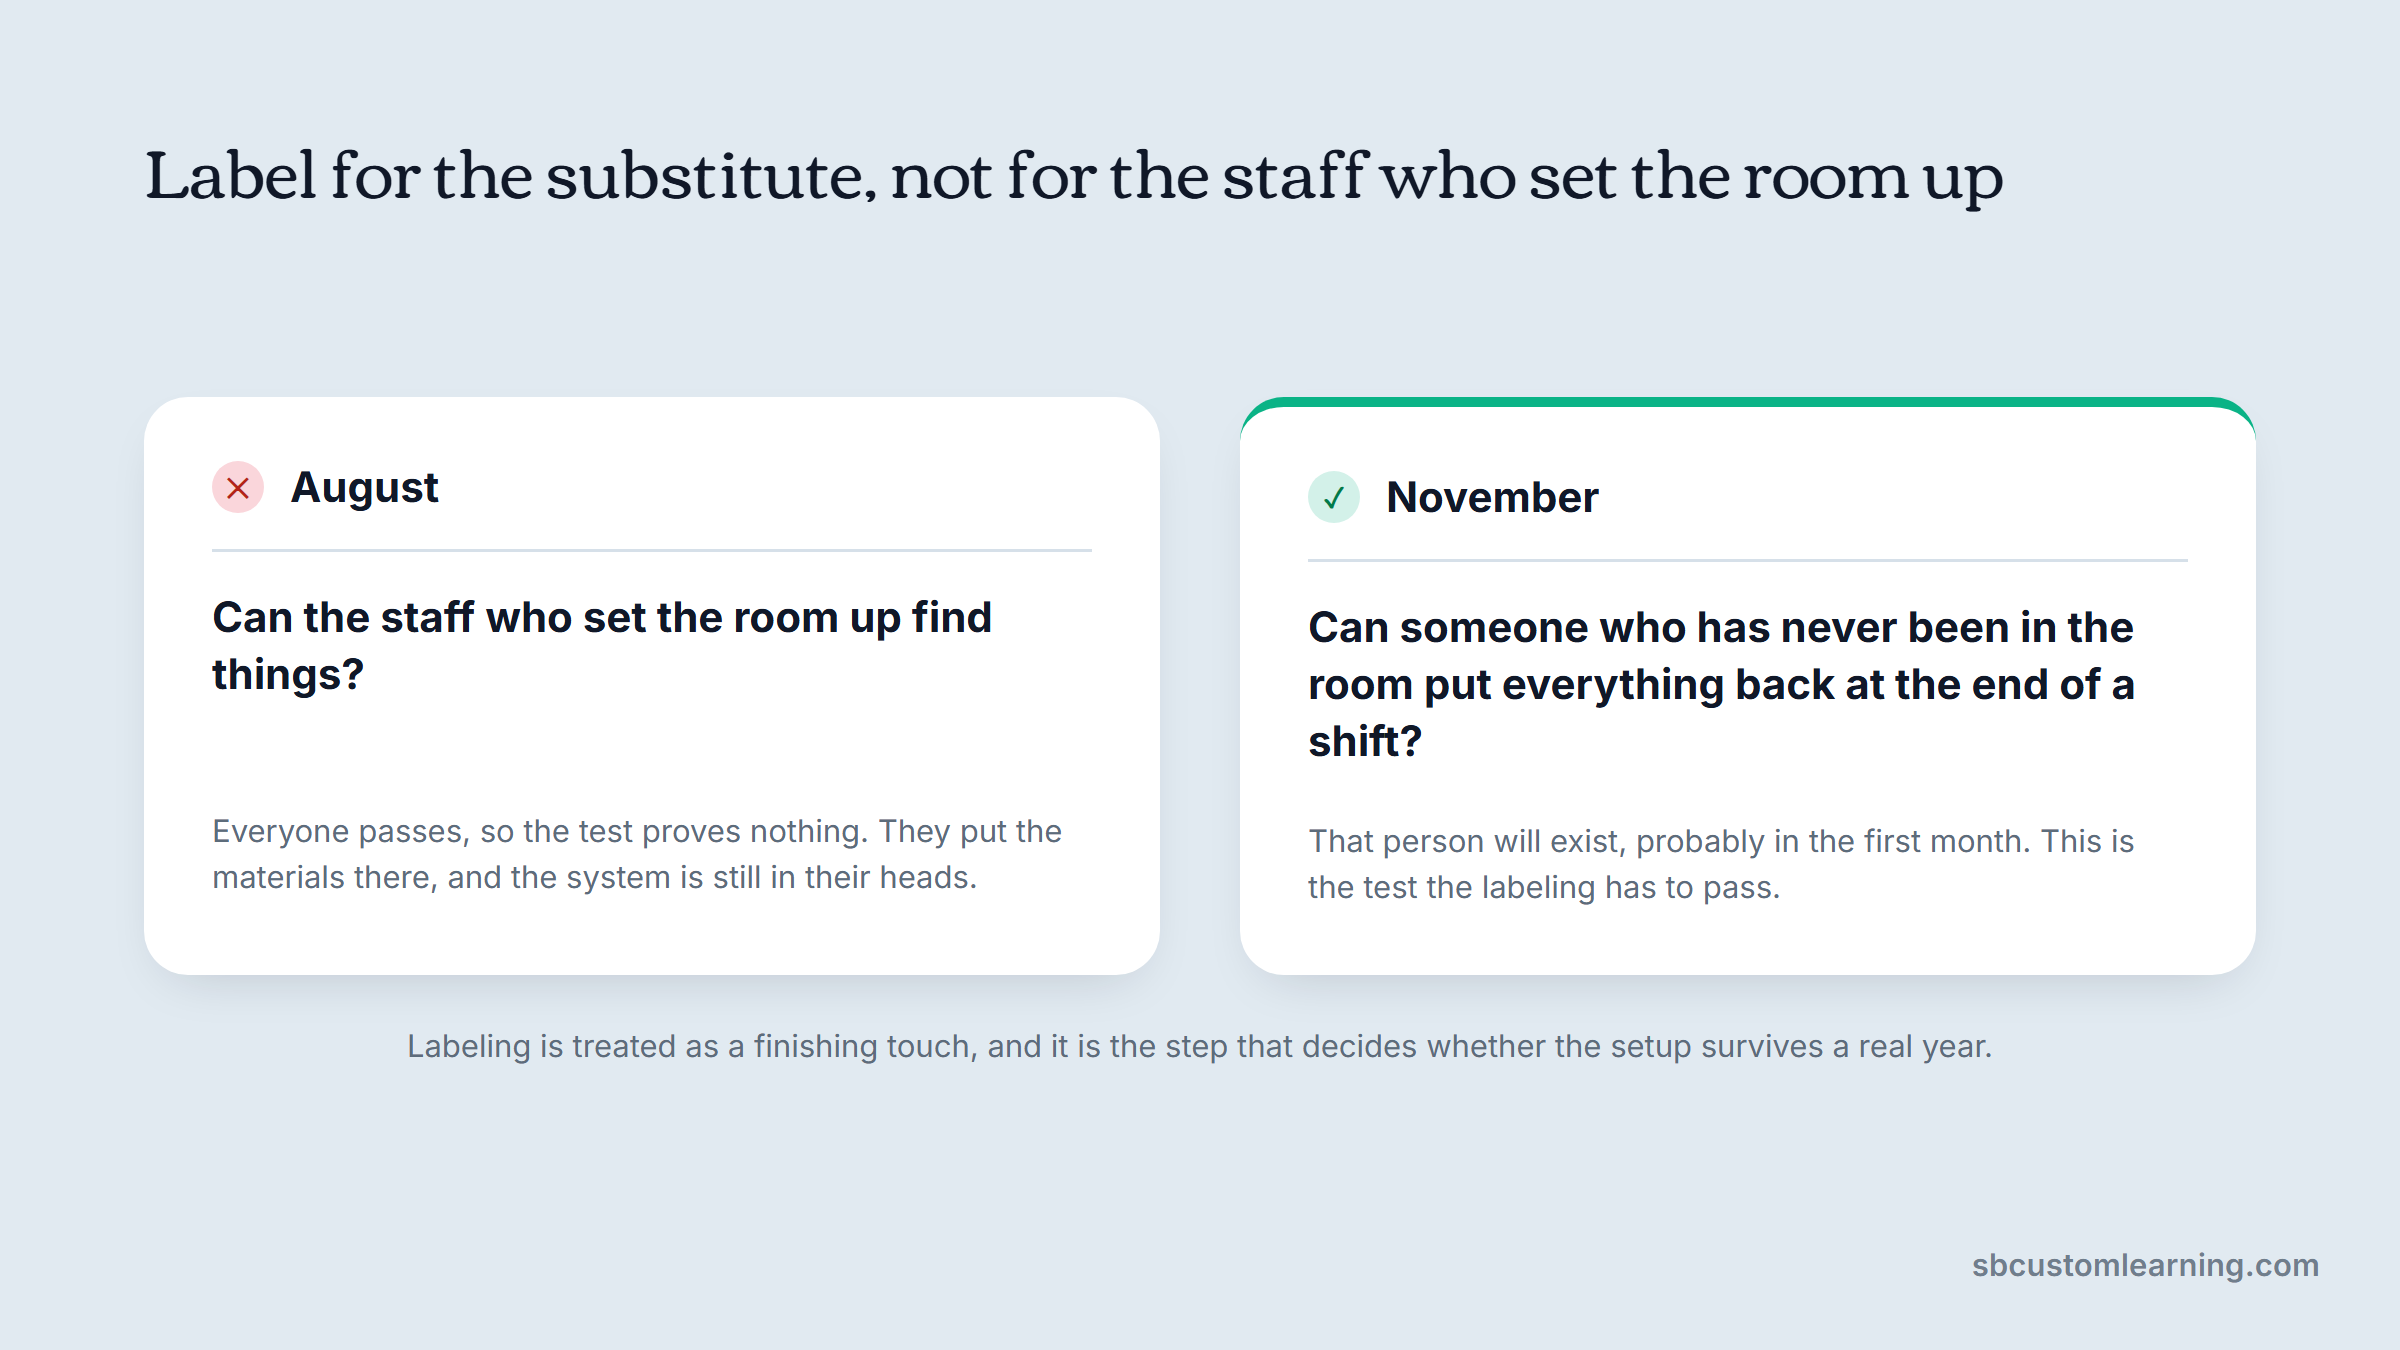
The test is not whether the current staff can find things. It is whether someone who has never been in the room can put everything back where it belongs at the end of a shift. That person will exist, probably in the first month.
Two tests, three months apart, and only the second one tells you anything.
Three things make a labeling system work in an early years room.
- Put a photograph and a word on every bin, so pre-readers and adults both use the same cue.
- Mark the shelf position too, so a removed container leaves a visible gap rather than a mystery.
- Capture an image of the finished center and keep it where that center is.
The third one does most of the work and costs an afternoon. A photograph tells a substitute more than a written procedure does, and it is the only documentation that stays accurate when you rearrange.
Walk It Cold Before Anyone Arrives
The last step before opening is to walk the room as though you have never seen it, ideally with someone who has not been part of the setup.
Crouch to child height at the door and look around. Can you see what each area is for? Is anything at head height with a hard corner? Does every exit route stay clear with the furniture where it now is? Can one adult standing in the supervision spot see into every center?
Formal daily checklists get mixed reviews from the people who have to complete them, and a monthly walk by the director catches layout drift that a rushed daily tick never will. Your own licensing agency sets what is actually required, so confirm the frequency there rather than here.
The design lesson holds either way: a room that depends on a daily checklist to stay safe has a setup problem, not a paperwork problem.
Where the Teacher Desk Goes
Classroom teacher desk setup is a genuine question in an early years room, and the honest answer is often that it should not be a desk.
A full adult desk in a preschool room consumes floor area that centers need, creates a tall visual block, and pulls the adult out of the play that guided learning depends on. What staff actually need is somewhere secure for a bag and a phone, a surface to write on, and a place for the folder that has to be reachable.
The version that works is usually a lockable cabinet or a wall-mounted shelf in the routine care zone, near the door, with a stool rather than a chair. It keeps adult belongings out of reach without claiming a corner of the room, and it puts the adult on their feet.
Four things, and none of them needs a desk to hold it.

Kindergarten rooms are the exception, since the age group runs more table-based work and the teacher genuinely needs a base. Even then, put it where it does not break the sightline to the quiet area.
When the Room Fights the Plan
Some rooms simply do not accommodate the layout the age group needs, and it is better to name that early than to force it.
The usual culprits are an odd shape, a structural column in the wrong place, a ceiling too low for anything vertical, or a room that is one large open space serving two age groups at once. Catalog furniture assumes a rectangle, so it fits these rooms badly and leaves dead corners nobody programs.
Two moves solve most of it without a contractor. Dividing an oversized room creates two properly scaled spaces out of one unusable one, and it can be undone when enrollment changes.
Going vertical buys square footage the floor plan does not have, which is what we did at Educare Chicago on a custom play loft.
Both are furniture and millwork installed by crews rather than permanent construction, which is the point: no permit conversation, and the room can change again when the age group does.
The Timeline, and What It Costs
A full room setup runs about four weeks from first measurement to opening, and the long pole is almost always lead time on furniture rather than labor.
| Week | What happens | What blocks it |
|---|---|---|
| 1 | Measure, photograph, pull age band and group size | Access to an empty room |
| 2 | Floor plan, zoning, furniture selection and quote | Sign-off from whoever holds the budget |
| 3 | Order placed, delivery scheduled, safety pass planned | Manufacturer lead times, which run long in summer |
| 4 | Delivery, placement, anchoring, stocking, labeling | Enough hands on delivery day |
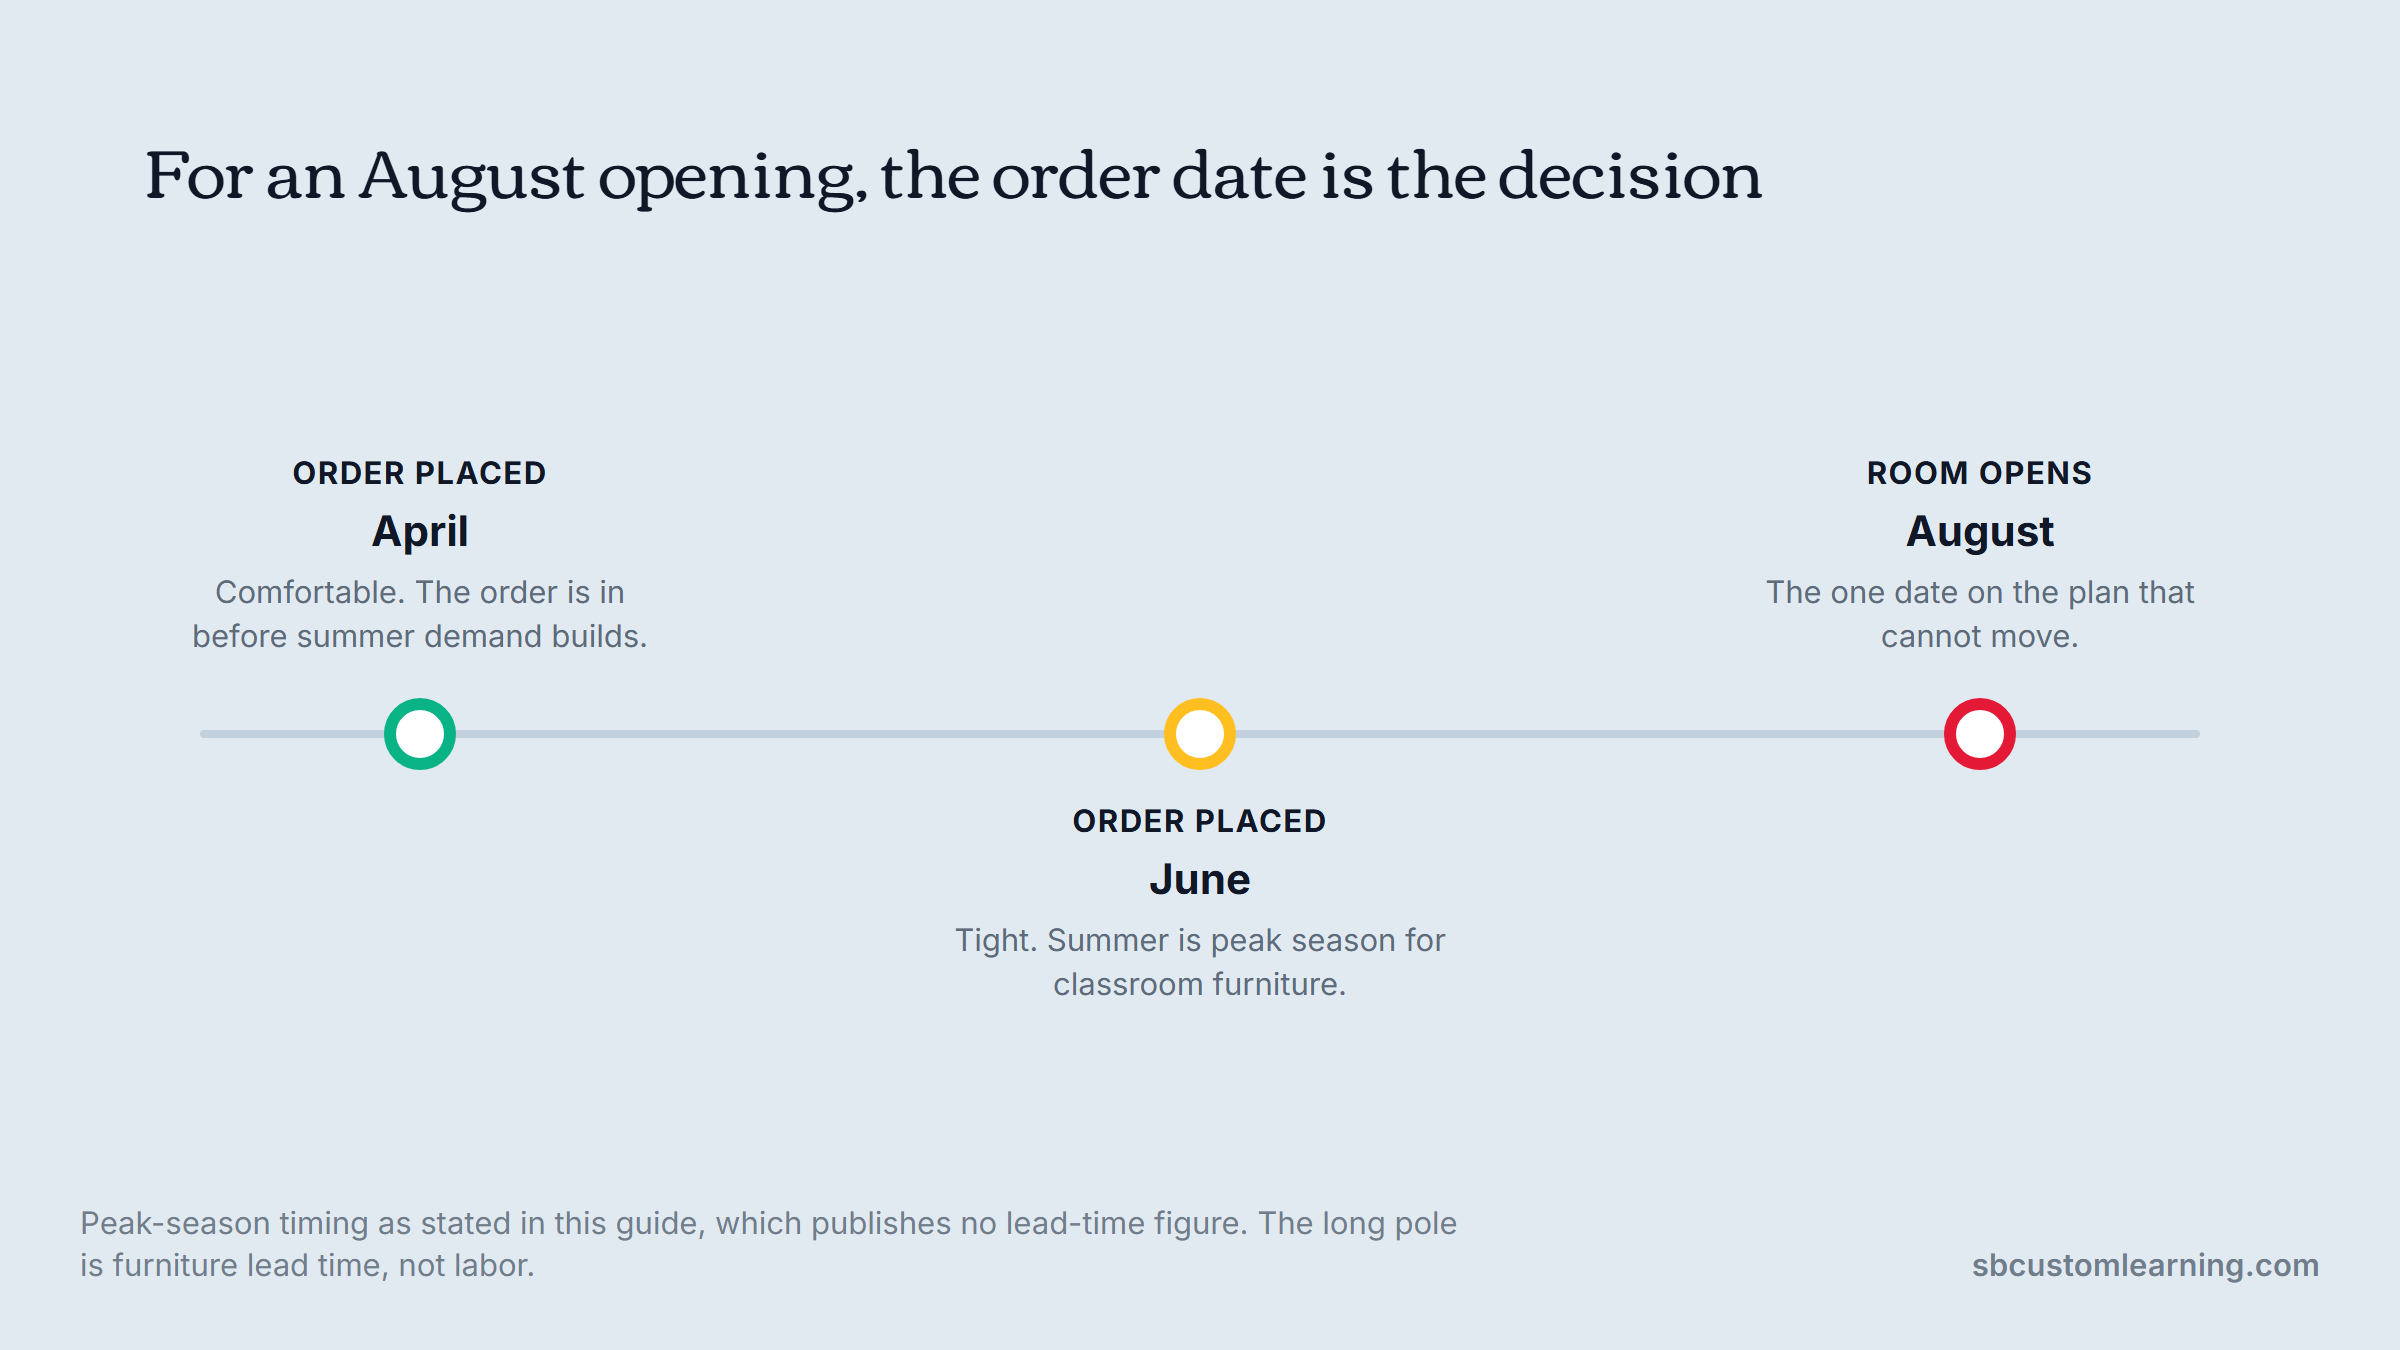
Two scheduling notes save real money. Summer is peak season for classroom furniture, so a June order for an August opening is tight and a April order is comfortable. And the anchoring and safety pass needs its own scheduled slot rather than being absorbed into delivery day.
The opening date is the fixed one; the order date is the only one you choose.
On cost, we quote per project rather than publish a rate, because a room's price depends on square footage, age group and how much of the existing furniture stays. Design consultation, custom builds and installation are all quote-based. What we can do is format that quote for a grant application, which matters when funding arrives against a category list and a deadline. Our services page sets out how consultation, sourcing and installation fit together.
Getting the Sequence Right
A classroom setup that works is mostly a matter of refusing to buy anything for the first two weeks.
Measure, map the fixed points, zone for noise and water, place furniture so it draws the boundaries, anchor it, stock it at the child's height, label it for someone who has never been there, then walk it cold. Nothing in that list is expensive. All of it is hard to retrofit once the room is full.
Our own process runs the same way: a consultation about your space, budget and age groups, then a design plan with layouts and finishes, then sourcing, delivery and installation.
If you want to start from a floor plan rather than a catalog, book a consultation and we will work from your measurements.
FAQs
What is the right order for setting up a classroom?
Measure the room and confirm the age band, map the fixed points like sinks and doors, zone for noise and water, place furniture so it defines the centers, anchor everything climbable, stock at child height, label for a substitute, then walk the room cold before anyone arrives. Buying furniture belongs after zoning, not before it.
How do you set up a preschool classroom in a small space?
Run fewer centers at full size instead of squeezing all of them in, because an undersized center generates more conflict than an absent one. Set the zones with back-to-back low shelving, lift displays onto the walls, and pair activities that share a water and noise profile, such as putting writing inside the library area.
Where should the teacher desk go in an early years classroom?
In most preschool and daycare rooms, classroom teacher desk setup should not involve a desk at all. A lockable cabinet or wall-mounted shelf near the door gives staff somewhere secure for belongings and paperwork without consuming floor area or blocking sightlines. Kindergarten rooms often justify a real base, but it still belongs where it does not interrupt the view into the quiet area.
How long does a classroom setup take?
About four weeks from first measurement to opening, assuming the room is empty and the budget is approved. Furniture lead times are the usual constraint, and they stretch over the summer, so an order placed in spring for an August opening is far more comfortable than one placed in June. Anchoring and the safety pass need their own scheduled time.
What does classroom setup cost?
There is no standard figure, because it depends on square footage, age group, how much existing furniture stays and how much is custom. We quote per project rather than publishing a rate, and design, custom builds and installation are all quote-based. If the money is coming from a grant, ask for the quote to be formatted against the funder's categories before you submit it.